Sunday, December 13, 2009

apperture


What is an "aperture" ?

Aperture is referred to the lens diaphragm opening inside a photographic lens. The size of the diaphragm opening in a camera lens REGULATES amount of light passes through onto the film inside the camera the moment when the shutter curtain in camera opens during an exposure process. The size of an aperture in a lens can either be a fixed or the most popular form in an adjustable type (like an SLR camera). Aperture size is usually calibrated in f-numbers or f-stops. i.e. those little numbers engraved on the lens barrel like f22 (f/22),16 (f/16), f/11, f/8.0, f/5.6, f/4.0, f/2.8, f/2.0, f/1.8 etc. Each of this value represents one time the amount of light either more or less in quantity. Meaning to say, f/16 will let in 1X the amount of light than a diaphragm opening of f/22 and so forth; while on the other hand, an aperture of f/4.0 will let in 1X lesser than that of f/2.8 etc.
Note: the diaphragm blades inside this manual focus Canon FD lens control the amount of light passing through the lens that eventually hitting to the film during an exposure process. The 'amount', or simply explained in layman term -opening changes according to selection of aperture (f/number). In this case, it is indicated by the f-numbers that imprinted on the lens barrel.
LENS SIDE:- If a simple word "diaphram" can be confusing to you, just try to think numbers engraved on the lens barrel are NOT referred to aperture diaphragm BUT rather, there are just number to let you refer the size of the lens diaphragm. So, if you are new to this, just memorize these numeric settings that will do, as they represent the corresponding size of the lens diaphram inside the lens and let you determine and control how much light you would require to let into the camera for a proper exposure by way of selecting an appropriate aperture diaphragm from large to small (lens opening). But technically, these numbers refer to the relative physical opening of the lens diaphragm. So, don't worry about the confusing part of them.

Modern Autofocus SLR cameras may have a different ways in manipulating the aperture. One of the trend is - the aperture value is now control via a thumb wheel on the camera (usually near the shutter release button) and the AF lens has no aperture ring to alter the value. Each camera manufacturer usually has their own series of lenses under a trade name to verify its usage, various compatibility issues with their previous camera model's function etc. For an instance, Canon manual focus lenses are called "FD" or "FL"; while their newer series of autofocus lenses (AF) designed for their Canon EOS Series cameras are referred as "EF" (Electro Focus). Each of these MF/AF lenses has their own respective way to illustrate the control of aperture in the camera. When you turn the aperture ring on a lens to vary the aperture, you will be able to check visually the set opening of the lens diaphragm (Opens bigger or stopping smaller). * here in this section, I am confining the discussion within the MANUAL FOCUS lenses ONLY because the proportion of used equipment forms the basis for a cheap, easy entry for potential new serious photographers.


Application
The aperture stop is an important element in most optical designs. Its most obvious feature is that it limits the amount of light that can reach the image/film plane. This can either be undesired, as in a telescope where one wants to collect as much light as possible; or deliberate, to prevent saturation of a detector or overexposure of film. In both cases, the size of the aperture stop is constrained by things other than the amount of light admitted; however:
 The size of the stop is one factor that affects depth of field. Smaller stops (larger f numbers) produce a longer depth of field, allowing objects at a wide range of distances to all be in focus at the same time.
 The stop limits the effect of optical aberrations. If the stop is too large, the image will be distorted. More sophisticated optical system designs can mitigate the effect of aberrations, allowing a larger stop and therefore greater light collecting ability.
 The stop determines whether the image will be vignetted. Larger stops can cause the intensity reaching the film or detector to fall off toward the edges of the picture, especially when for off-axis points a different stop becomes the aperture stop by virtue of cutting off more light than did the stop that was the aperture stop on the optic axis.
 A larger aperture stop requires larger diameter optics, which are heavier and more expensive.
In addition to an aperture stop, a photographic lens may have one or more field stops, which limit the system's field of view. When the field of view is limited by a field stop in the lens (rather than at the film or sensor) vignetting results; this is only a problem if the resulting field of view is less than was desired.
The pupil of the eye is its aperture; the iris is the diaphragm that serves as the aperture stop. Refraction in the cornea causes the effective aperture (the entrance pupil) to differ slightly from the physical pupil diameter. The entrance pupil is typically about 4 mm in diameter, although it can range from 2 mm (f/8.3) in a brightly lit place to 8 mm (f/2.1) in the dark.
In astronomy, the diameter of the aperture stop (called the aperture) is a critical parameter in the design of a telescope. Generally, one would want the aperture to be as large as possible, to collect the maximum amount of light from the distant objects being imaged. The size of the aperture is limited, however, in practice by considerations of cost and weight, as well as prevention of aberrations (as mentioned above).

In photography
The aperture stop of a photographic lens can be adjusted to control the amount of light reaching the film or image sensor. In combination with variation of shutter speed, the aperture size will regulate the film's degree of exposure to light. Typically, a fast shutter speed will require a larger aperture to ensure sufficient light exposure, and a slow shutter speed will require a smaller aperture to avoid excessive exposure.


Diagram of decreasing aperture sizes (increasing f-numbers) for "full stop" increments (factor of two aperture area per stop)
A device called a diaphragm usually serves as the aperture stop, and controls the aperture. The diaphragm functions much like the iris of the eye – it controls the effective diameter of the lens opening. Reducing the aperture size increases thedepth of field, which describes the extent to which subject matter lying closer than or farther from the actual plane of focus appears to be in focus. In general, the smaller the aperture (the larger the number), the greater the distance from the plane of focus the subject matter may be while still appearing in focus.
The lens aperture is usually specified as an f-number, the ratio of focal length to effective aperture diameter. A lens typically has a set of marked "f-stops" that the f-number can be set to. A lower f-number denotes a greater aperture opening which allows more light to reach the film or image sensor. The photography term "one f-stop" refers to a factor of √2 (approx. 1.41) change in f-number, which in turn corresponds to a factor of 2 change in light intensity.
Aperture priority is a semi-automatic shooting mode used in cameras. It allows the photographer to choose an aperture setting and allow the camera to decide the shutter speed and sometimes ISO sensitivity for the correct exposure. This is sometimes referred to as Aperture Priority Auto Exposure, A mode, Av mode, or semi-auto mode.[3]

Maximum and minimum apertures
The specifications for a given lens typically include the minimum and maximum apertures. These refer to the maximum and minimum f-numbers the lens can be set at to achieve, respectively.


The aperture range of a 50mm "Minolta" lens, f/1.4-f/16
A typical lens will have an f-number range from f/16 (small aperture) to f/2 (large aperture) (these values vary). The maximum aperture (minimum f-number) tends to be of most interest (and is always included when describing a lens). This value is also known as the lens speed, because it is proportional to the square of accepted light, and thus inversely proportional to the square of required exposure time (i.e. using a lens with f/2, one can take pictures at one quarter of the exposure time necessary using a f/4 lens). Lenses for 35mm cameras can have f-numbers below f/1.0. For instance both the Leica Noctilux-M 50mm ASPH and a Canon 50mm L-mount for rangefinders have a maximum aperture of f/0.95. Professional lenses for some movie cameras have f-numbers as low as f/0.75 (very large relative aperture). These are known as "fast" lenses because they allow in more light and therefore reduce the exposure time. Stanley Kubrick's film Barry Lyndon has scenes with the largest relative aperture in film history: f/0.7.
Lenses of low f-number, often with fixed focal length, are popular for example with photojournalists, who often work in dim light and typically have limited opportunity to introduce supplementary lighting.
Zoom lenses typically have a maximum aperture (minimum f-number) of f/2.8 to f/6.3 through their range. A very fast zoom lens will be constant f/2.8 or f/2, which means the relative aperture will stay the same throughout the zoom range. A more typical consumer zoom will have a variable relative aperture, since it is harder and more expensive to keep the effective aperture proportional to focal length at long focal lengths; f/3.5 to f/5.6 is an example of a common variable aperture range in a consumer zoom lens.

Wednesday, December 9, 2009


FIVE BASIC FEATURES OF CAMERA
LENS - The lens is the eye of the camera. Its function is to bring light from the subject into focus on the film. A camera can have a single lens or a complex set of lenses. Together with the shutter, the lens controls the amount of light that enters the camera.
FILMS - Certain characteristics help people determine which film will work best in a particular situation. Films may vary in their sensitivity to different kinds of light and in their ability to record fine details or quickly moving subjects.
VIEWFINDER - A viewfinder enables photographers to frame their subject the way they would like it to appear in the finished photograph. Some viewfinders consist of a simple window on top of the camera that only approximates the view through the lens. A more complex and more accurate viewfinding system is the single-lens-reflex system, described above.
SHUTTER - The shutter, a spring-activated mechanical device, keeps light from entering the camera except during the interval of exposure. Most modern cameras have focal-plane or leaf shutters. The focal-plane shutter consists of a black shade with a variable-size slit across its width. When released, the shade moves quickly across the film, exposing it progressively as the slit moves. In the leaf shutter, at the moment of exposure, a cluster of meshed blades springs apart to uncover the full lens aperture and then springs shut.
APERTURE - The lens diaphragm controls the size of the aperture, or lens opening, and thus the amount of light that passes through the lens. It operates in conjunction with the shutter. The aperture size is measured by numerical settings called f-stops. On a traditional, manually controlled camera the f-stops are inscribed on an adjustable ring that fits around the lens. Typical f-stops are f/2, f/2.8, f/4, f/5.6, f/8, f/11, and f/16. The setting f/2 represents a large aperture, f/16 a small aperture. With simple automatic-exposure cameras, a computer sets the aperture size; thus the aperture ring has disappeared from many of today's lenses.
Lenses come with a rating for their maximum aperture, indicating how much light can reach the film when the lens diaphragm is wide open. With single-lens-reflex cameras, the maximum aperture also influences how bright the image appears in the viewfinder. Within lens types, a lens with a large maximum aperture will have a larger diameter and weigh more than a lens with a smaller aperture. A telephoto lens requires a larger lens diameter and greater length to let in the same amount of light as a normal or wide-angle lens. Like telephoto lenses, zoom lenses are also physically large. To reduce their bulkiness and complexity, many manufacturers now design zoom lenses with a variable maximum aperture: The size of the aperture changes as the focal length of the lens goes from wide-angle to telephoto settings.

TYPES OF CAMERAS

Point and Shoot Camera

The most popular camera type today is the point-and-shoot camera. It has a number of automatic features that make it practically foolproof to operate while producing pictures of high quality. Point-and-shoot cameras feature battery-operated electronic systems that may include automatic controls for exposure, focusing, flash, film winding, and film rewinding. They are available with a fixed single-focal-length lens or a zoom lens; the lenses cannot be removed from the body.

Point and shoot cameras mean just that, point the camera at something and trip the shutter. The camera does all the work for you. Unfortunately, the camera is rarely as smart as the photographer so the results can be iffy. Point and shoot cameras are often abbreviated as P&S. These cameras started out as a fixed lens that focused about 4 feet in front of the camera with a fixed aperture and shutter speed. It was basically a box with a shutter. Then the lab that developed the film did what it could to fix the exposure. Today's P&S cameras are much more sophisticated. While there are still some P&S film cameras, such as the disposable or one time use cameras, most P&S today are digital.

Features
• Metering systems, which calculate the amount of light entering the camera
• Variable shutter speed
• Variable aperture
• Zoom lenses
• Automatic focus
• Preset controls for various photographic situations such as:
o landscapes
o nighttime
o people
o close-up or macro

The biggest drawback to P&S cameras is that many do not have a through the lens (TTL) viewfinder. This means that what you see through your viewfinder may not be what you capture on film or digital media. P&S cameras are usually small and fit into a pocket or purse. They are best used for casual picture taking where capturing the memory is more important than creating a marketable image.


Single-Lens Reflex Cameras-One of the most popular designs available today, the single-lens reflex (SLR) both views and photographs through one lens. Light passing through the lens is reflected by a mirror and brought to focus on a ground glass. The mirror causes a reversal of the image seen on the ground glass, but the addition of a pentaprism mounted over the ground glass allows the camera to be used at eye level, with the image seen upright and in proper left/right orientation. An instant before the exposure is made, the mirror swings upward, and the shutter is activated. A single control cocks the shutter for the next exposure, advances the film, and returns the mirror to focusing position.


Instant Cameras-An instant camera will produce a finished print in from 20 seconds to about 4 minutes. The film, after exposure, is passed between two stainless steel rollers inside the camera. These rupture a chemical pod on the film and spread developing agent evenly over the film's surface. In the original Polaroid system it was necessary for the user to peel the finished print from the base material. Professional Polaroid films, both color and black and white, are still developed in this manner. With the Polaroid SX-70 (1972), however, the developing picture is ejected from the camera, and the film reaches its final development in full daylight. The process is completed in about 4 minutes. Later instant cameras use a new focusing system employing an ultra-high-frequency sound emitter. An electronic circuit in the camera measures the time required for the sound to be reflected back from the object being photographed. This time measurement is converted into a measurement of distance, and an electrical mechanism coupled to the focusing circuit sets the lens for the proper exposure.In 1993, Polaroid introduced a single-lens reflex model that does not eject shots like other instant cameras but instead transports the developed picture to a viewing area and container on the camera back.
Disposable Cameras-A disposable camera is a cardboard box containing a roll of film and a lens along with a simple viewfinder, a button for shooting, and a film advance mechanism. Like the earliest box cameras, the lens is fixed in focus--that is, its aperture is small enough so that anything more than about four feet away will photograph in focus. After the user has shot the full roll of film, the entire camera is returned to a processing lab, the film is developed and printed, and the box and its fittings returned to the camera maker who will use it to make new cameras.

VIEWING SYSTEMS

SINGLE LENS REFLEX
• Single Lens — The camera uses one lens for both taking and viewing. In other words you look through the same lens as the camera uses to expose the film or sensor (as opposed to twin-lens reflex cameras).


TWIN LENS REFLEX
• Twin Lens — The camera uses two lenses, one for viewing and for taking.


FOCUSING SYSTEMS

RANGEFINDER- Rangefinder cameras were the first cameras to have an optical viewfinder—that is, a separate, window-like lens through which the photographer sees and frames the subject. The viewfinder is paired with an adjacent window called a rangefinder. To focus the camera, the photographer adjusts a ring or collar until the two views appear as one, at which point the camera has set the focus to precisely match the distance of the subject. Since the viewfinder window does not show the scene through the lens, but only one that closely approximates it, rangefinder cameras can be inaccurate for framing close-up shots.
Rangefinder cameras were once very popular with amateur photographers, but today’s point-and-shoot cameras have largely replaced them. Nevertheless, the modern rangefinder camera works well under certain circumstances, and some professionals still use it. Rangefinders are available in two formats, for use with either 35-millimeter film or the larger format 6-centimeter film. Unlike point-and-shoot cameras, modern rangefinders feature lenses that can be removed from the camera body so that photographers can choose a lens specifically suited to the subject.


AUTOFOCUS- Autofocus cameras use electronics and a small computer processor to automatically sample the distance between camera and subject and from this determine the exact plane of focus. The computer then signals a small mechanism that turns the lens barrel to this point.
There are two widely used methods for determining the focus automatically, called active and passive. An active autofocus system, used in most point-and-shoot cameras, emits either an infrared light beam or high-energy (ultrasonic) sound waves. When the light or sound waves bounce off the subject and return to the camera, they give an accurate reading of the distance to that subject. Passive systems, used in more sophisticated cameras, automatically adjust the focus of the lens until sensors detect that maximum contrast has been reached inside a rectangular target at the center of the focusing screen. The point of maximum contrast corresponds to the point of greatest sharpness.

Lighting Techniques

Photography and Lighting

Lighting "make a photograph" - a very true and true to life statement, just as "clothes make a man"! Consequently if you are a photographer the importance of correct photography lighting techniques need not be overemphasized. Light effects create prize winning photographs that the great connoisseurs of art crave for. The most relevant topic in photography is type of lighting and how to use it for the best possible result in your photographs. To make the subject easier we shall discuss four basic types of lighting and their conventional usage and constraints.

1. Back Lighting - One of the most popular forms of artistic photography is done through back lighting the objects. It can also be a constraint in case of normal photography when one wishes to capture lighting effects along with the subjects of the photographs like humans or other objects. Perfect photography lighting techniques are to be used in case you wish to capture the breathtaking effect of sunrise and sunset say on a beach with human subjects taking in that natural view! Of course, if one wants to take a silhouette and create a lasting effect it is necessary to compose the picture without any form of filters or flash photography. In contrast if one desires the entire composition to be evenly lit it is advisable to use fill flash equipment.


2. Side Lighting - One of the most common and popular artistic photography methods of illuminating the subject, object, and the background to give really stunning effects! Many systems are possible and these photography lighting techniques can offer a true art form when properly implemented. Half lit and half dark (kind of eclipse effect!) photographs give uncanny but thrilling effects to your hobby. Allowing light to fall from the side and casting a shadow on the opposite side can enhance features if a close up is contemplated. Special portraits are taken with side lighting to emphasize the right or left features of a human form and give depth to an object like flower vases, round objects etc. Photography lighting techniques using the side illumination effect are used for depicting texture and somehow also gives a three dimensional effect.


3. Artificial Lighting - Most indoor photography is carried out with artificial lighting and in this art form - the sky is the limit! Your passport or marriage proposal photograph is normally taken in artificial light. However, for artistic photography, artificial light needs to be well arranged to avoid undesirable effects such as red eye, yellow tinge, and a harsh environment.


4. Diffused Lights - Most important and most natural photography lighting techniques are with the use of diffused light systems. For many photo compositions it is necessary to avoid direct light from falling on the subjects or objects. In case of outdoor photography one must choose the right time of day to take a snap. Sunrise, sunset and mid day sunlight can be too harsh for a proper picture to be snapped. The use of suitable filters is advised to avoid hot spots and create a mush smoother lighting effect.


Outdoor Lighting

The prefix photo- means “light, or radiant energy.” Photography is all about light. How light is used in making a photograph can make all the difference in the resulting image. Light defines space, place, time of day, and mood. Creative use of light can be used for dramatic impact, to lend extra depth, and to add to the general composition of the photograph. The following tips can help you to use light to your advantage for improving your photography, no matter what type of camera you use.

What is the time of day?

Bright sunlight, midday, is not the best time for photography. In fact, it may be the worst, if you think of light in terms of its interaction with shadow. Light and shadow form compositional elements that continuously change as the light changes. At midday, there is very little shadow; existing shadows are harsh and contrasty.

Sharply contrasted elements can sometimes lend themselves to an interesting composition, but in most cases, hard bright light washes away interesting elements in landscapes, and creates unflattering shadows across people’s faces. In landscape photography, there is no “magic hour.” However, every scene has its moment of prime light, and with patience you may be able to capture it. Long after high noon, for example, the light steadily begins to improve. During late afternoon, shadows become part of the composition, evoking drama and emotion. Light later in the evening takes on a golden or reddish glow. Take the time to continue shooting a scene as the light fades into the evening. You may be amazed at the results.

What direction is the light coming from?

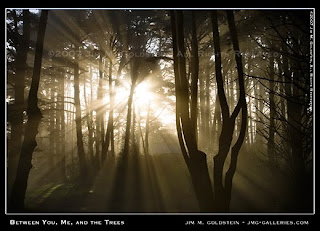
When shooting outdoors, frontlighting (sun behind the photographer) is most commonly used and the least interesting direction of light for your images. It works well for showing great detail on the surface of your subject, such as flowers blossoms, but sidelighting is a much better light to use whenever feasible. Sidelighting adds depth impact to your photos, whether your subject is a pinecone, sand dune ripples, a vast forested landscape, or a bustling cityscape. The most dramatic is backlighting, or shooting “against the light.” This technique is difficult to master, but worth it. Backlighting can be used to create silhouettes of the subjects in the foreground (often people) with wonderful results. Think backlighting when photographing anything translucent such as misty spider webs, delicate blooms, or wispy blond hair. When using backlight to photograph a person, use your flash or a reflector to lighten the face and avoid an unintentional silhouette.

What’s going on in the sky?

A clear blue sky is almost never as interesting or as dramatic as low lying mist, a distant storm, or the intensely orange and pink clouds at sunset. Remember that light and shadow in the sky can create beauty, drama, and endless photographic possibilities.

How’s the weather?

Contrary to what most people may think, bad weather may be the best time to get out the camera. Rainy, overcast days can provide unusual opportunities for some great photos. Foggy or misty weather can evoke moody, even surreal images. Overcast days are perfect for photographing people. Absent are harsh shadows and squinty eyes, and the necessity of positioning your subject according to the location of the sun.

Facial features are softer, and sometimes more animated, such as during a downpour, or in the faces of children splashing in a puddle or huddled under an umbrella. On a gray day, look for bright colors, remembering that rain intensifies them.

Conversely, light on a gloomy day can be soft and muted. Look for subtle shades of color in landscapes that may not be apparent on bright sunny days. Use a tripod in low light conditions where slower shutter speeds may be necessary. If you can’t control the shutter speed on your camera, use a faster film on less than perfect-weather days, such as 200 or even 400 ISO.

When to use a flash?

Beyond after-dark snap shots, flash photography can be extremely useful when taking photographs out-of-doors. Use a fill-flash to lighten unflattering midday shadows on the face of your subject. Better yet, turn the subject into the shade for backlight, then use a fill-flash to lighten the face. Use the flash to lighten overall dark scenes, or to add sparkle in dreary weather. Your flash can be used to highlight interesting areas within the image frame, which is especially effective if you are able to adjust the output of your flash and preserve the ambient light of the scene. Fill-flash can even be used to emphasize movement. This can be done by combining existing light exposure with flash and a slow shutter speed. The resulting image, called “flash ghosting,” will be slightly blurred, emphasizing motion.

How about a reflector?

This is a tool that every photographer should have. A reflector can often provide just enough “fill” without using any flash at all by bouncing light from behind your subject back to the subject. You can see the effect immediately, prior to snapping the picture. A large piece of white poster board works well, but is not very handy. You can purchase collapsible reflectors in various sizes and colors. Gold, for example, can transform cool facial shadows into warm pleasing skin tones.
Taking pictures outdoors can be challenging, stimulating, and full of exciting possibilities. Experiment with light, as well as composition, subject matter, color, and theme. Learn everything you can about your equipment and how to use it.

Indoor Lighting


Indoor photography has many advantages, among them the ability to be creative with things like lighting and backdrops. With the following tips, you will be well on your way to photos you never thought possible.

Film is the first thing to consider when taking indoor pictures. . For portraits and interior shots, ISO 400 speed film is the one of choice. For indoor sporting events, however, 800 speed film is much better. Artificial lights can cause colors to alter; therefore, a tungsten balanced film is the best choice. It is this type of film professionals use most often. The best thing to do is try several films until you find one that produces images to your taste, then stick with that one. Having a film you know you’ll like will leave you free to spend energy on making decisions about the changeable aspects of your photos.


Backdrops can be plain or elaborate and made from any number of items, from sheets to fake fur and plain walls to professional backdrops from a photography shop. A plain backdrop is often preferable to a print one. You want the focus of your picture to be on your subject, not your backdrop. Keep in mind that flash may bounce off your backdrop and reflect onto your subject. When choosing your backdrop, find a color that will enhance your subject if this happens. A white backdrop will provide an additional light source because of this bouncing effect.


For a textured backdrop, try hanging fake fur or satin. A sheet of wood paneling also makes an interesting backdrop that won’t distract from your subject. Let your imagination guide you and experiment with many things. A backdrop that fully captures the mood you are trying to create is, by far, the best choice.

Lighting for indoor photography offers many choices. The best of these is natural light. Positioning your subject where light from a skylight or window falls is ideal. This produces the most natural coloring and the light is usually very soft. The only other light you may need with natural lighting is fill flash.

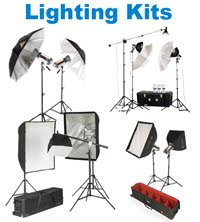
In the absence of natural light, professionals suggest what is known as three-point lighting. Position your major light source at a forty-five degree angle to your subject. Directly across from this light source, place some type of reflector, such as white cardboard, to bounce the light back toward your subject. Lastly, place a soft light behind your subject to prevent shadows. This is a lighting arrangement that works well with almost every subject.

A change of lighting can change the entire mood of a photograph. If you are going for a gentler look, keep your lighting soft. This can be done by bouncing your flash off a wall, ceiling or other reflector. If the light is still too harsh for your liking, try taping a tissue over your flash unit to soften it even more. If dramatic is what you are aiming to achieve, bright light is needed. This will create more shadows, and therefore contrast, and give a more dramatic tone to your resulting photo.


A word on reflectors is needed here. You can create your own inexpensive reflector. A piece of white poster board, a sheet or a white wall or ceiling will work fine. For a more portable reflector that will last a while, try covering a cookie sheet with silver or gold foil, or even one on each side. This will enable you to get two different effects without changing much else.


Lighting can be manipulated to create any mood you choose. Try using colored bulbs in your lamps, draping sheer scarves over lights or even using simple candlelight only. The possibilities are endless and will create hours of enjoyable photography for you.

Tuesday, December 8, 2009

Top Picks


As promised…

Posting the best among the rest.


BENCH CONNECTION
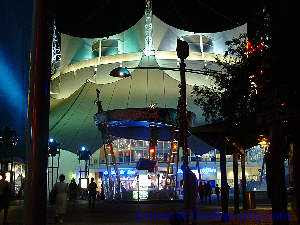
This photo was taken at the launching of "Bench Connection", an event intended to fight against abortion. The event was attended by famous celebrities and celebrity endorsers last Saturday, November 17, 2008 at the NBC Tent, The Fort, Taguig. Ten percent of the proceeds of the Bench sales will go to the STOPABORTION foundation. TEXT BY ERWIN OCAÑA


BRIDGE VS NOTHINGNESS
The walk- of sacrifice; of strength; of power and of music. it's not the Great Wall nor the London's bridge, it's a walk to the woody bridge against the rocks. a picture of hardship from the start, with the music of victory 'till the end. TEXT BY JULIE ANN GRACE VIRATA


ART AT AN EARLY AGE
At the early age of this child, he is already learning to appreciate the art of photography, gazing the beauty of nature, a wonderful place to live in.
TEXT BY MICHAEL JOE DELIZO


MEETING AT BOTH ENDS
PRAGUE -- A city where fun starts at night. The colorful night lights conceals the hot and sweaty ambiance of Prague during the day. As they say, "hardwork deserves a lil' bit of fun and beer". TEXT BY RAY MARC DELA CRUZ


THE LOST BOY
A young American soldier is wandering in the ruins of the attacks in Idaho, USA. Terrorists attacked the place yesterday, November 27, 2009.
TEXT BY ROZANNE MARIE CAPARAS


Thanks a lot chinchin for making all these possible :)

Appreciate your help.

Choosing Lenses

Sometimes the choice of lens is dictated by the situation- a telephoto lens when the photographer is unable to get closer the scene and a wide angle when he or she cannot move any further back to get the entire scene in.

You may think that brand is the first thing to decide. If you are still searching for a camera, this would be true. Looking at lenses when deciding which camera brand to buy is very wise. Each camera body is best when paired with lenses made by the same manufacturer, specifically designed for that particular camera.

It is true that you can get a third-party lens by companies such as Sigma, Tamron, and Tokina. Many people do get such lenses and are perfectly happy. It mostly depends on how much shooting you are going to do; if you are really serious about photography, we recommend getting Canon lenses for Canon, Nikkor lenses for Nikon, and Minolta lenses for Minolta... The may cost more but they are worth every extra penny.

While the brand you choose is determined for the most part by which camera you own, other decisions still need to be made.
The first decision to make is whether to go with a zoom or a fixed focal length lens. What's a fixed focal length lens, you ask? It is basically a lens that does not zoom.

Lenses are measured in millimeters. Forget about what the millimeters refer to and just learn this:
• 20mm or less = Extreme Wide Angle
• 24mm to 35mm = Wide Angle
• 50mm to 80mm = Normal
• 100mm to 300mm = Telephoto
• 400mm and above = Super Telephoto

Whether it is a zoom or fixed focal length, each lens will most likely fall into one of these areas. Some stretch the envelope; others can cover everything from 35mm wide angle shots to 350mm telephoto shots. You pay a price for this kind of convenience, though. The lens is heavier and does not allow as much light to reach the film. This latter fact means that you will have a more difficult time shooting in relatively low light conditions. You will need to use a tripod more often, and the lens may not catch fast action as well as you would like.

If you are just starting, get at least a normal/wide-angle lens. A zoom in the range of 28mm to 80mm works best. If you can afford it, also get a medium to long telephoto, say 100mm to 300mm. One camera body and two such lenses makes an awesome combination when out in the field.

From this foundation, you can add an extreme wide angle if you like to do panoramic, expansive scenes or wacky, wild angles.

Also consider adding a super telephoto, especially if you like shooting wildlife, sports, etc. These long-range lenses are a lot of fun and open up many new opportunities. Children, for one, are much easier to photograph from a slight distance.

Specialties and Options

If you find that you love to shoot abstract close-ups of things like flowers, bugs, and dripping water droplets, you might like a good macro. Those who know this is what they are going to be doing can save themselves a lot of money but just getting one 50mm macro instead of a 50mm normal lens and an additional macro lens. A 50mm macro works just as well for normal photography; its design simply allows you to get much closer to your subject than you could with a normal lens. This gives you the added ability to do fun close-up work.

You can also get tele-extenders that will magnify your lens by 1.4 of 2. For example, putting a 2x teleconverter on a 200mm lens will give you a 400mm. However, such teleconverters cut out a lot of light, making it more difficult to maintain fast shutter speeds and shoot without a tripod or in low-light conditions.
Lens elements

A lens or lens assembly on a network camera performs several functions. They include:
• Defining the field of view; that is, defining how much of a scene and level of detail are to be captured.
• Controlling the amount of light passing through to the image sensor so that an image is correctly exposed.
• Focusing by adjusting either elements within the lens assembly or the distance between the lens assembly and the image sensor.

Field of view

A consideration to take into account when selecting a camera is the field of view required; that is, the area of coverage and the degree of detail to be viewed. The field of view is determined by the focal length of the lens and the size of the image sensor; both are specified in a network camera’s datasheet.

A lens' focal length is defined as the distance between the entrance lens (or a specific point in a complicated lens assembly) and the point where all the light rays converge to a point (normally the camera’s image sensor). The longer the focal length, the narrower the field of view.

The fastest way to find out what focal length lens is required for a desired field of view is to use a rotating lens calculator or an online lens calculator, both of which are available from Axis. The size of a network camera’s image sensor, typically 1/4”, 1/3”, 1/2” and 2/3”, must also be used in the calculation. (The drawback of using a lens calculator is that it does not take into account any possible geometrical distortion of a lens.)

The field of view can be classified into three types:
Normal view: offering the same field of view as the human eye.


Telephoto: a narrower field of view, providing, in general, finer details than a human eye can deliver. A telephoto lens is used when the surveillance object is either small or located far away from the camera. A telephoto lens generally has less light gathering capability than a normal lens.


Wide angle: a larger field of view with less detail than in normal view. A wide-angle lens generally provides good depth of field and fair, low-light performance. Wide-angle lenses sometimes produce geometrical distortions such as the “fish-eye” effect.


Different fields of view: wide-angle view (at left); normal view (middle); telephoto (at right).


There are three main types of lenses:

• Fixed lens: Such a lens offers a focal length that is fixed; that is, only one field of view (either normal, telephoto or wide angle). A common focal length of a fixed network camera lens is 4 mm.
• Varifocal lens: This type of lens offers a range of focal lengths, and hence, different fields of view. The field of view can be manually adjusted. Whenever the field of view is changed, the user has to manually refocus the lens. Varifocal lenses for network cameras often provide focal lengths that range from 3 mm to 8 mm.
• Zoom lens: Zoom lenses are like varifocal lenses in that they enable the user to select different fields of view. However, with zoom lenses, there is no need to refocus the lens if the field of view is changed. Focus can be maintained within a range of focal lengths, for example, 6 mm to 48 mm. Lens adjustments can be either manual or motorized for remote control. When a lens states, for example, 3x-zoom capability, it is referring to the ratio between the lens’ longest and shortest focal length.

Wednesday, December 2, 2009

Anything But Photographs

Welcome to our den…

Allow yourself to create your own world of creativity, learning and fun. You will be heroes here --- individuals with great talents, individuals with promising bright ideas, individuals who has the ability to move things beyond any form of supreme power…to speak without even talking…to express yourselves without showing any emotions through photographs.

Let us all go out. Explore the environment. Take pictures.

After all, this is your life through the lens.

This will be anything but photographs.